


Work Order Management Guide
This guide provides detailed instructions on how to manage work orders in the system, including creating new orders, viewing existing ones, and exporting order data.
1. Overview of the Work Orders Screen
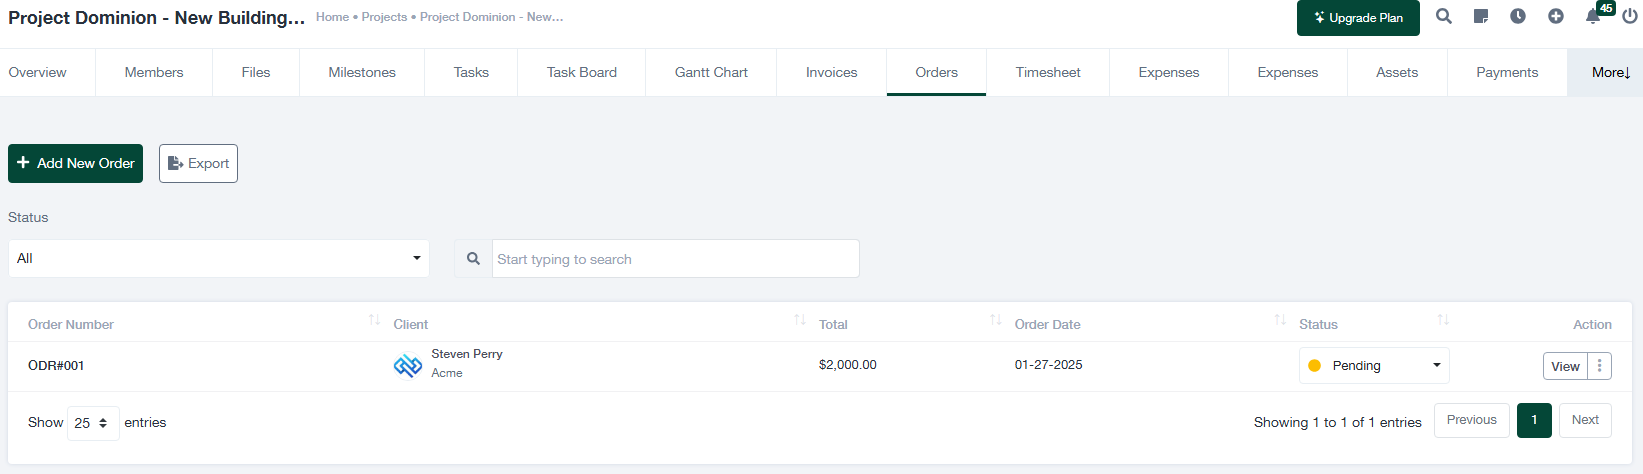
The “Orders” tab within a project allows users to manage all associated work orders. Below are the key features of the screen:
- + Add New Order: Click this button to create a new work order. It opens the “Create Order” form for adding order details.
- Export: Use this button to download the list of work orders in a CSV or Excel format for reporting or analysis.
- Status Dropdown: Filter work orders by their status (e.g., Pending, Approved, Completed).
- Search Bar: Use the search bar to find specific orders based on keywords such as order number, client name, or project.
- Columns: The table displays information such as Order Number, Client Name, Total Amount, Order Date, Status, and Action buttons for viewing or editing the order.
Below the table, you can navigate through pages of orders or adjust the number of entries displayed per page using the pagination controls.
2. Creating a New Work Order
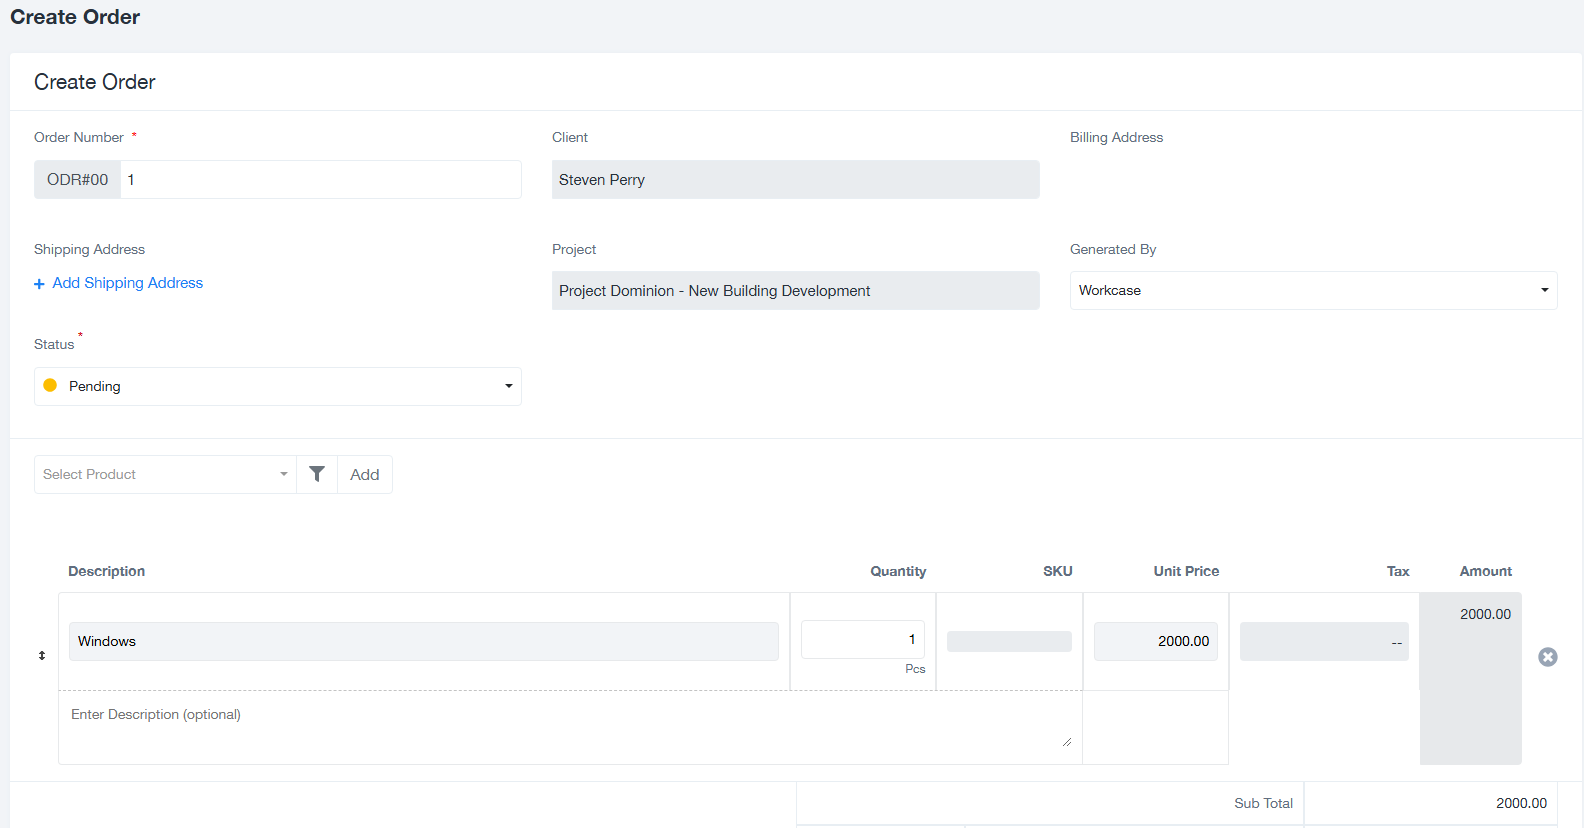
To create a new work order, follow these steps:
- Click the + Add New Order button on the “Orders” screen. This will open the “Create Order” form.
- Fill in the following fields in the form:
- Order Number: The unique identifier for the order. This is typically auto-generated but can be edited if needed.
- Client: The client associated with the order. This is pre-filled based on the project.
- Project: The project under which the order is being created.
- Status: Set the current status of the order (e.g., Pending, Approved).
- Shipping Address: Add a shipping address if applicable by clicking “Add Shipping Address.”
- Products or Services: Select the products or services to include in the order:
- Click the Select Product dropdown to choose a product.
- Enter the quantity, SKU, unit price, and tax if applicable.
- Description: Optionally, add a description for the order.
- Review the subtotal, tax, and total amount fields at the bottom of the form.
- Click Save to finalize the order or Cancel to discard it.
3. Managing Existing Work Orders
The “Orders” screen also allows you to manage existing work orders. Here’s how:
- View Details: Click the View button in the “Action” column to view detailed information about a specific order.
- Edit Orders: Depending on your permissions, you may be able to edit an order by clicking the appropriate action button.
- Filter and Search: Use the status dropdown and search bar to quickly locate specific orders.
- Export Data: Click the “Export” button to download a report of the displayed orders.
4. Tips for Efficient Work Order Management
- Ensure Accuracy: Double-check the order details, including products, quantities, and prices, before saving.
- Use Filters: Regularly use the status filter and search bar to keep track of pending and completed orders.
- Export Regularly: Export orders periodically for record-keeping and reporting purposes.
For additional assistance, please contact your administrator or refer to the Help Center.