


Project Management Guide
This guide provides a detailed walkthrough for managing projects, including creating, tracking, and analyzing project progress and data.
1. Overview of the Projects Screen
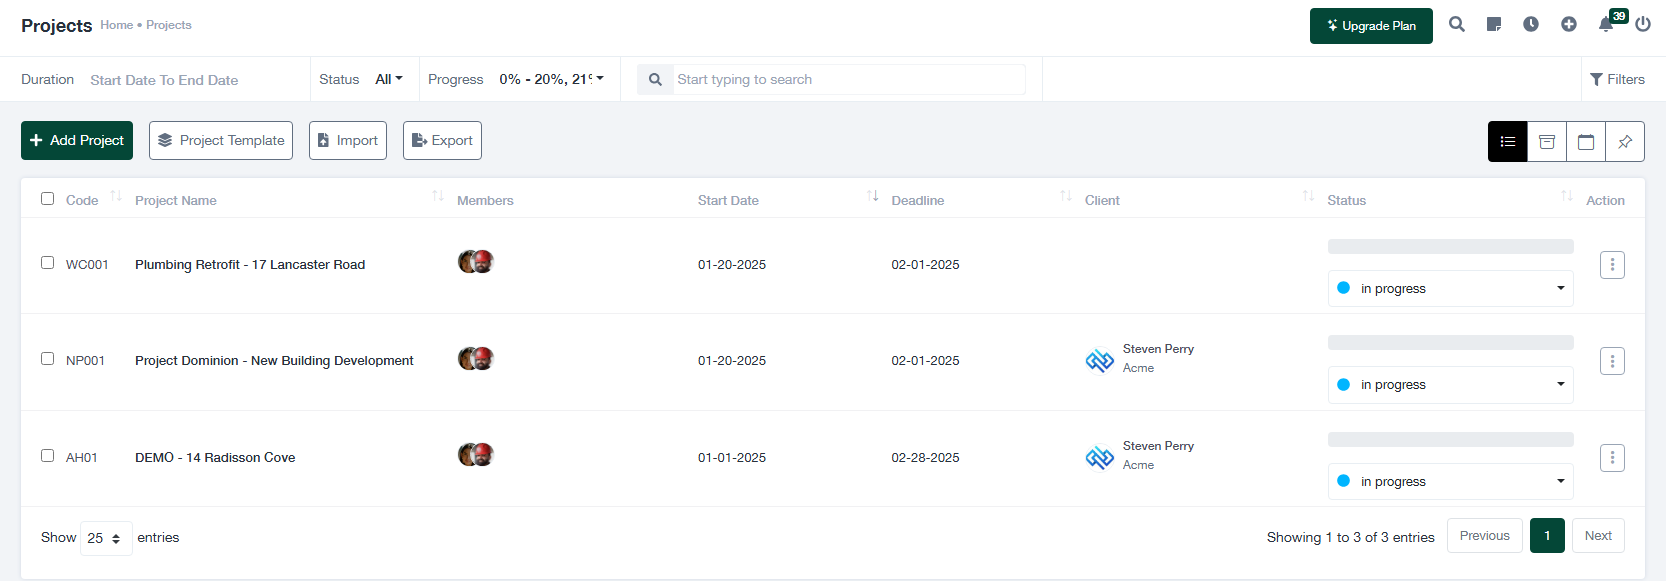
The “Projects” screen serves as the central hub for managing all projects. The following features are available:
- + Add Project: Initiate the creation of a new project.
- Project Template: Access templates to standardize project structures and data entry.
- Import: Bulk upload project data from external files.
- Export: Download project details in CSV or Excel format for analysis or reporting.
- Filters: Narrow down projects using filters for duration, start and end dates, status, and progress percentage.
- Search Bar: Quickly locate a project by typing in the project name, code, or client name.
- Project Table: Displays the following columns:
- Code: Unique identifier for the project.
- Project Name: Name of the project.
- Members: Employees assigned to the project.
- Start Date: When the project begins.
- Deadline: The project’s completion date.
- Client: Client associated with the project.
- Status: Current status (e.g., in progress, completed).
- Action: Options to view or edit project details.
- Pagination: Navigate through multiple pages of projects, adjusting the number of entries displayed per page as needed.
2. Creating a New Project
To create a new project, follow these steps:
- Click the + Add Project button.
- Fill out the “Project Details” form with the following fields:
- Project Name: Enter the name of the project.
- Code: Provide a unique project code.
- Client: Select the client associated with the project.
- Description: Provide an overview of the project, including objectives and key deliverables.
- Start Date: Specify when the project begins.
- Deadline: Specify the project’s completion date.
- Project Members: Assign employees responsible for the project.
- Project Budget: Enter the estimated budget for the project.
- Click Save to finalize the project creation or Cancel to discard changes.
3. Tracking Project Progress
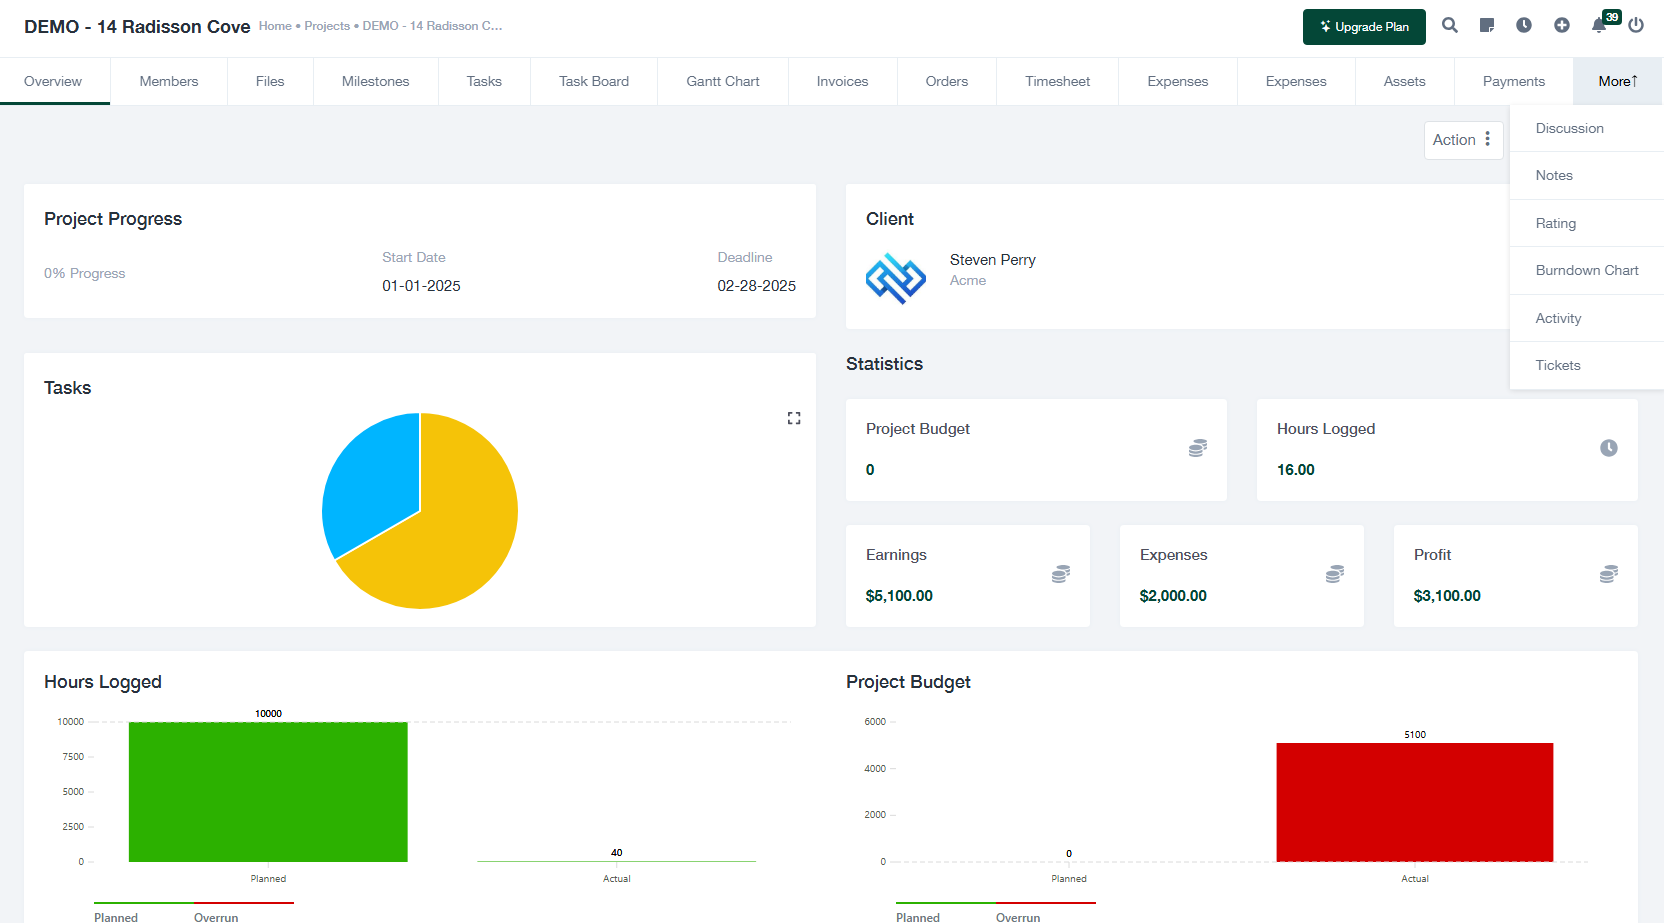
To monitor and manage project progress:
- Click on the project’s name in the table to open its detailed view.
- The project overview screen displays the following key metrics:
- Project Progress: Percentage of completed tasks and milestones.
- Client: Client associated with the project.
- Statistics: Information about the project budget, expenses, earnings, and profit.
- Tasks: A pie chart showing task statuses (e.g., completed, pending).
- Hours Logged: A bar chart displaying planned vs. actual hours worked.
- Project Budget: Visualization of planned vs. actual budget usage.
- Use the tabs to access other details, such as milestones, task boards, Gantt charts, and invoices.
4. Exporting Project Data
To export project data for reporting:
- Click the Export button at the top of the “Projects” screen.
- Select the desired file format (e.g., CSV, Excel) and download the data.
5. Tips for Effective Project Management
- Regularly update task and milestone statuses to reflect accurate project progress.
- Use the “Project Template” feature for consistent project setup and management.
- Assign project members and communicate roles clearly to ensure accountability.
- Monitor budget and hours logged to prevent overruns.
- Export project data periodically for reporting and analysis purposes.