


Module vendeurs
Le module "Fournisseurs" est conçu pour gérer tous les fournisseurs associés à votre organisation. Il permet d'ajouter, de modifier, d'afficher et d'exporter les coordonnées des fournisseurs. Les fournisseurs peuvent être liés à des projets, ce qui facilite la gestion efficace des collaborations et des ressources.
2. Caractéristiques du module "Fournisseurs
Liste des fournisseurs

- Affiche tous les fournisseurs sous forme de tableau avec les colonnes suivantes :
- Nom du contact principal: Le point de contact principal pour le vendeur.
- Nom de l'entreprise: La raison sociale du vendeur.
- Courriel: L'adresse électronique du vendeur.
- Téléphone: Numéro de contact du vendeur.
- Action: Options permettant d'afficher, de modifier ou de supprimer les coordonnées du fournisseur.
- Inclut des options de tri et de filtrage pour faciliter la navigation.
- Actions en bloc pour gérer plusieurs fournisseurs à la fois.
Ajouter un vendeur
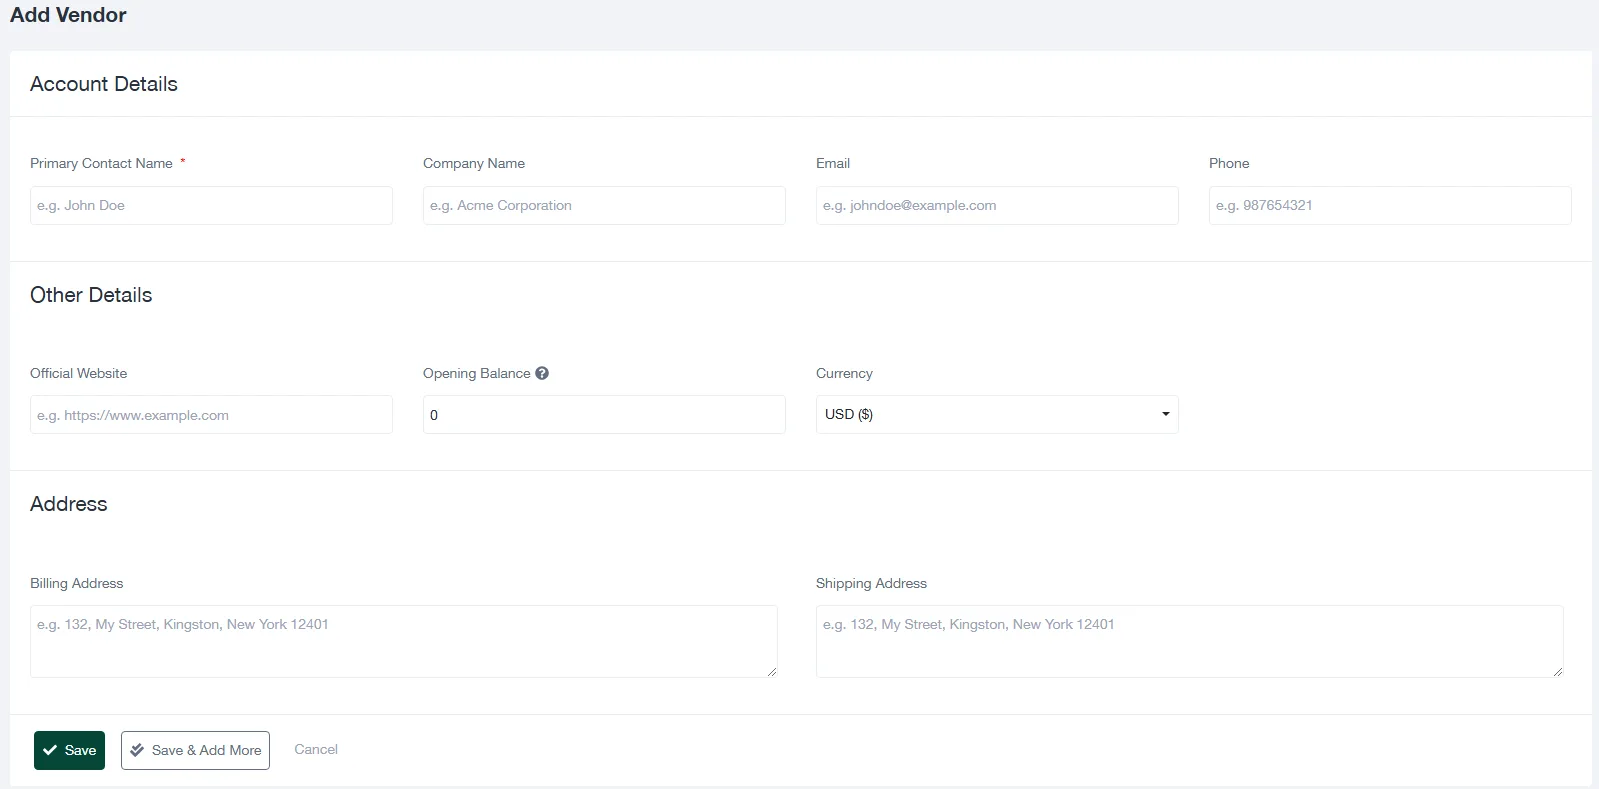
Le Ajouter un vendeur permet aux utilisateurs de créer de nouveaux profils de fournisseurs avec les détails suivants :
- Détails du compte:
- Nom du contact principal (obligatoire) : La personne principale à contacter chez le fournisseur.
- Nom de l'entreprise: La raison sociale du vendeur.
- Courriel: Adresse électronique du vendeur pour la communication.
- Téléphone: Numéro de contact du vendeur.
- Autres détails:
- Site officiel: URL du site web du vendeur.
- Solde d'ouverture: Tout solde restant à enregistrer.
- Monnaie: La devise utilisée pour les transactions.
- Adresse:
- Adresse de facturation: Adresse de facturation du vendeur.
- Adresse de livraison: Adresse pour l'envoi des articles, le cas échéant.
Vendeurs à l'exportation
La fonction d'exportation des fournisseurs vous permet de télécharger la liste des fournisseurs dans différents formats (par exemple, CSV, Excel) à des fins de reporting ou de sauvegarde.
3. Instructions pas à pas
Ajout d'un fournisseur
- Naviguez vers le module Vendeurs.
- Cliquez sur le bouton + Ajouter un vendeur bouton.
- Remplissez les champs obligatoires et facultatifs du formulaire :
- Nom du contact principal: Obligatoire.
- Nom de l'entreprise: Optionnel.
- Courriel: Facultatif mais recommandé pour la communication.
- Téléphone: Optionnel.
- Saisissez les détails de l'adresse dans les champs Adresse de facturation et Adresse de livraison.
- Cliquez sur Économiser pour ajouter le vendeur, ou Sauvegarder et ajouter pour ajouter des fournisseurs supplémentaires.
Visualisation d'un fournisseur
- Trouvez le fournisseur dans la liste en utilisant des filtres ou en effectuant une recherche.
- Cliquez sur le bouton Voir dans le Action pour obtenir les coordonnées complètes du vendeur.
Modification d'un fournisseur
- Cliquez sur le bouton Voir pour le fournisseur que vous souhaitez modifier.
- Modifiez les détails nécessaires dans le formulaire.
- Cliquez sur Économiser pour appliquer les modifications.
Suppression d'un fournisseur
- Localisez le fournisseur dans la liste.
- Cliquez sur le bouton Supprimer dans le Action colonne.
- Confirmez la suppression lorsque vous y êtes invité.
Vendeurs à l'exportation
- Cliquez sur le bouton Exportation dans la liste des fournisseurs.
- Choisissez le format de fichier souhaité (par exemple, CSV, Excel).
- Enregistrez le fichier exporté sur votre appareil.
4. Meilleures pratiques
- Veiller à ce que les informations sur les fournisseurs soient régulièrement mises à jour afin d'en garantir l'exactitude.
- Utilisez fréquemment la fonction d'exportation pour créer des sauvegardes des données des fournisseurs.
- Fournissez autant de détails que possible lors de l'ajout d'un nouveau fournisseur afin d'améliorer les rapports et le suivi.
5. Dépannage
Problème : Impossible d'ajouter un fournisseur
Assurez-vous que tous les champs obligatoires sont remplis (par exemple, le nom du contact principal). Vérifiez que l'adresse électronique saisie est dans un format valide.
Problème : L'exportation ne fonctionne pas
Vérifiez votre connexion internet. Assurez-vous que les fenêtres pop-up sont activées dans votre navigateur pour l'application.
6. FAQ
Q : Puis-je affecter des fournisseurs à des projets spécifiques ?
R : Oui, les fournisseurs peuvent être liés à des projets lors de la création ou de la modification d'un projet.
Q : Y a-t-il une limite au nombre de fournisseurs que je peux ajouter ?
R : Non, il n'y a pas de limite au nombre de vendeurs que vous pouvez ajouter.
Q : Puis-je importer des fournisseurs d'un autre système ?
R : Le système prend actuellement en charge l'ajout manuel ou l'exportation pour la sauvegarde. La fonctionnalité d'importation dépend de l'intégration des systèmes.