


Facturation
Apprenez à créer des factures à partir de bons de commande. Ce guide décrit la procédure à suivre pour assurer un suivi précis de la facturation et des paiements dans le système.
Gestion des factures
Après avoir créé une facture, vous pouvez la gérer à l'aide des actions disponibles :
- Vue : Examinez les informations détaillées de la facture.
- Télécharger/voir PDF : Télécharger ou consulter le projet de loi au format PDF.
- Marquer comme payé : Mettre à jour le statut de la facture pour refléter l'achèvement du paiement.
- Editer : Apporter des modifications à la facture si nécessaire.
- Supprimer : Supprimer la facture du système si elle a été créée par erreur.
Étapes de la création d'un projet de loi
-
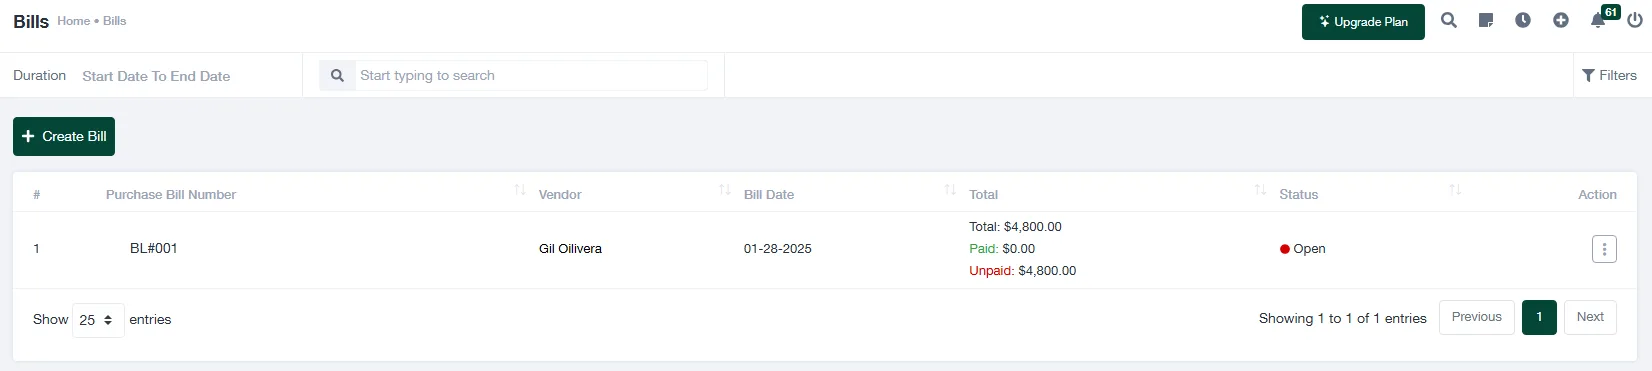
Naviguer vers la section des factures
Aller à la page Factures dans le tableau de bord principal. Cette section affiche une liste de toutes les factures existantes, avec des détails tels que le numéro de la facture d'achat, le fournisseur, la date de la facture, le montant total, le montant payé et le statut.
-
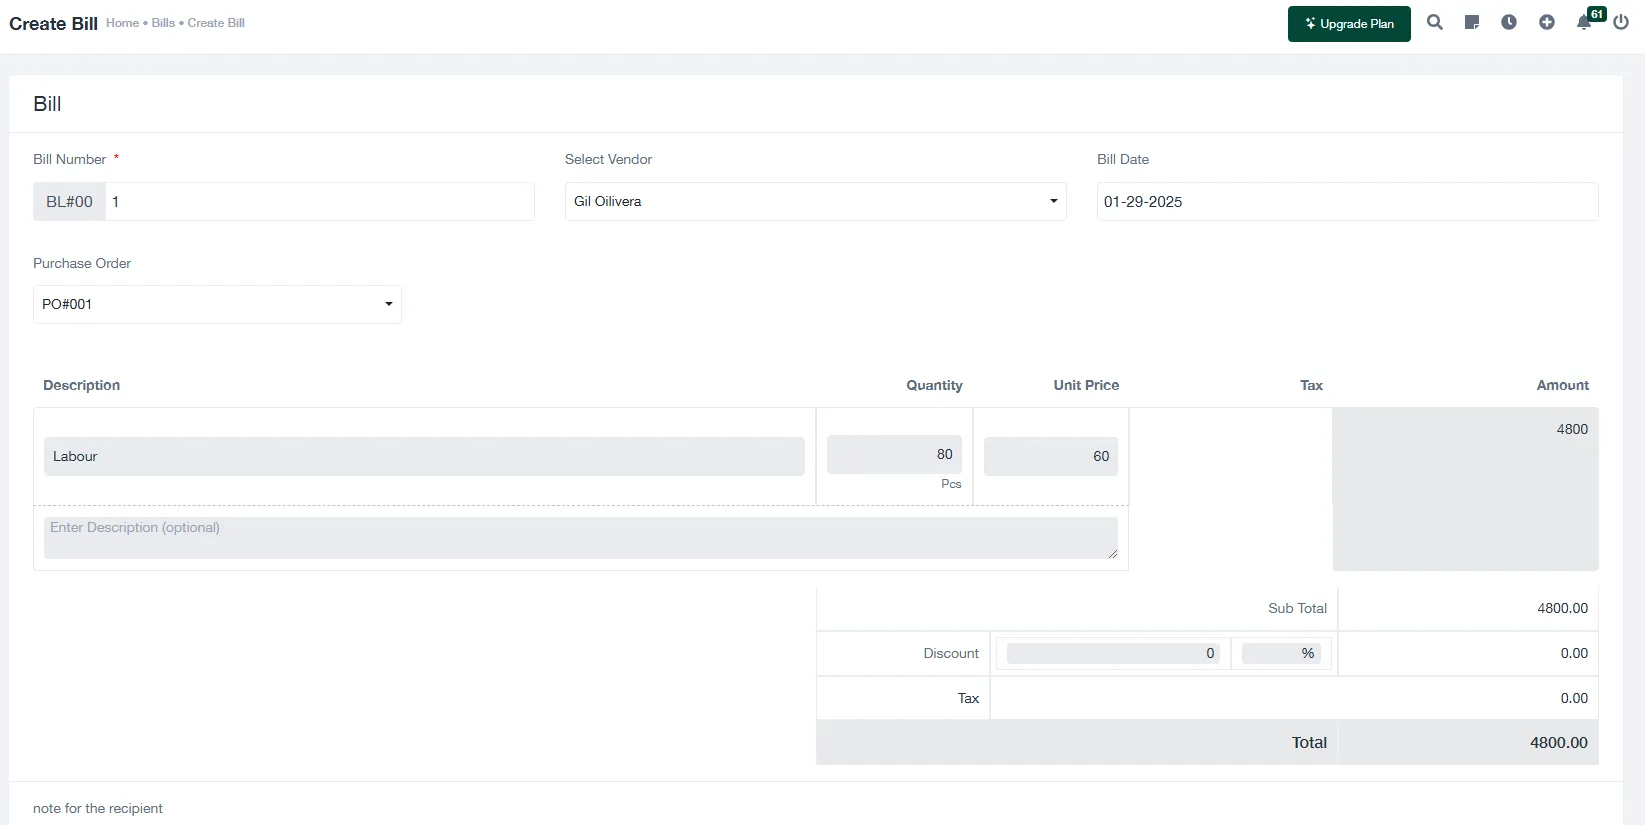
Cliquez sur "Créer une facture"
Sélectionnez l'option Créer une facture pour lancer le processus de création d'une nouvelle facture.
-
Remplir les détails de la facture
- Numéro de facture : Attribuer un identifiant unique à la facture (par exemple, BL#001).
- Sélectionnez le fournisseur : Choisissez le fournisseur associé à la commande dans le menu déroulant.
- Date de la facture : Définir la date d'émission de la facture.
- Bon de commande : Lier la facture à une commande spécifique en la sélectionnant dans la liste.
-
Ajouter une description et des détails sur les prix
Fournir une description des articles ou des services facturés, la quantité, le prix unitaire et les taxes applicables. Veillez à ce que les montants correspondent aux détails du bon de commande afin d'éviter les divergences.
-
Réviser et économiser
Vérifiez à nouveau l'exactitude de tous les détails saisis. Une fois la vérification effectuée, cliquez sur Économiser pour générer la facture. La facture apparaît alors dans la liste des factures et son statut est défini sur Ouvrir.
Meilleures pratiques
- Assurez-vous que le bon de commande est finalisé avant de créer une facture.
- Faites correspondre les détails des articles, les quantités et les prix à la commande d'achat afin de maintenir la cohérence.
- Utilisez l'option "Marquer comme payé" dès que le paiement est effectué afin de maintenir les dossiers financiers à jour.