


Article de connaissance : Créer et gérer des pistes
Cet article fournit un guide complet sur la création et la gestion des prospects à l'aide de l'écran "Contacts prospects". Il couvre les fonctionnalités essentielles et les instructions étape par étape pour optimiser la gestion des prospects.
Vue d'ensemble
Le Contacts principaux sert d'interface principale pour la création, l'affichage et la gestion des informations sur les contacts des prospects. Les utilisateurs peuvent facilement ajouter de nouveaux prospects, importer des données, exporter des enregistrements existants et filtrer ou rechercher des contacts spécifiques. Vous trouverez ci-dessous une explication détaillée de ses caractéristiques et de ses fonctionnalités.
Filtres et options de recherche
- Filtres déroulants : Permet aux utilisateurs d'affiner les pistes affichées en fonction de paramètres spécifiques, tels que le type ou le statut.
- Durée Champ : Permet de filtrer les pistes en fonction d'une date de début et de fin.
- Type Dropdown : Fournit des options de filtrage catégorisées pour différents types de prospects.
- Barre de recherche : Un champ de recherche par mot-clé pour localiser rapidement des pistes spécifiques.
Boutons d'action clés
L'écran comprend plusieurs boutons clés permettant de gérer les activités liées au plomb :
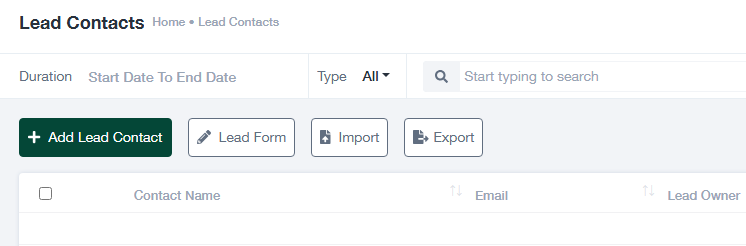
- + Ajouter un contact principal :
- Ouvre un formulaire pour la saisie manuelle des détails d'un nouveau prospect.
- Permet la saisie de champs obligatoires, tels que le nom, l'adresse électronique et la propriété.
- Forme du plomb :
- Redirige vers un formulaire détaillé qui peut être intégré à votre site pour la saisie d'informations complètes sur les prospects.
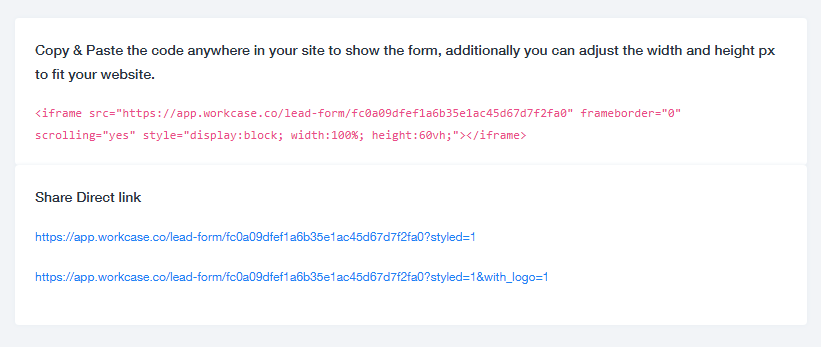
- Redirige vers un formulaire détaillé qui peut être intégré à votre site pour la saisie d'informations complètes sur les prospects.
- Importation :
- Facilite l'importation en masse de données de prospects à partir de sources externes (par exemple, des fichiers CSV ou Excel).
- Comprend un outil de mappage intuitif permettant d'aligner les colonnes du fichier sur les champs du système.
- Exporter :
- Permet aux utilisateurs de télécharger des enregistrements de prospects dans un format sélectionné (par exemple, CSV ou Excel) pour un accès hors ligne ou une analyse.
Tableau de données pour la gestion des prospects
La partie principale de l'écran affiche un tableau contenant tous les enregistrements de prospects : 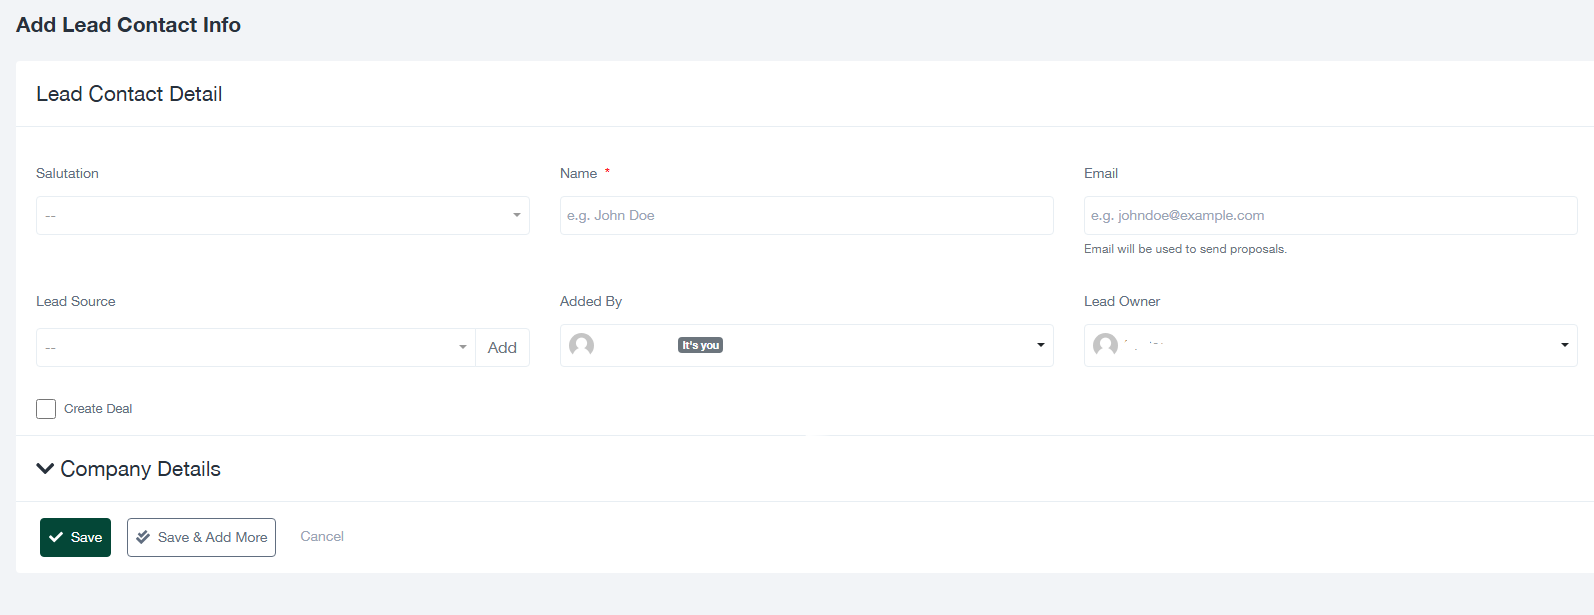
- Colonnes du tableau :
- Nom du contact
- Courriel
- Chef de file
- Ajouté par
- Date de création
- Actions
- Contrôles de pagination : Situées au bas du tableau, ces commandes permettent de naviguer dans plusieurs pages d'enregistrements. Les utilisateurs peuvent ajuster le nombre d'entrées affichées par page.
Cas d'utilisation courants
- Ajout d'une nouvelle piste :
- Cliquez sur le bouton "+ Ajouter un contact principal".
- Remplissez les champs nécessaires dans le formulaire contextuel (par exemple, nom, adresse électronique, propriétaire du lead).
- Cliquez sur "Enregistrer" pour ajouter le nouveau lead au système.
- Importation de leads :
- Cliquez sur le bouton "Importer".
- Téléchargez un fichier contenant des données sur les prospects dans le format requis.
- Suivez les instructions qui s'affichent à l'écran pour faire correspondre les colonnes du fichier aux champs du système.
- Confirmez et terminez le processus d'importation.
- Leads à l'exportation :
- Cliquez sur le bouton "Exporter".
- Sélectionnez le format de fichier souhaité.
- Télécharger le fichier contenant les données exportées.
- Filtrage et recherche de prospects :
- Utilisez la liste déroulante des filtres ou le champ de la durée pour réduire la liste des prospects.
- Tapez des mots-clés spécifiques dans la barre de recherche pour localiser rapidement des pistes individuelles.