


Guide de gestion des clients
Ce guide explique étape par étape comment gérer les clients dans l'application, y compris l'ajout de clients, l'affichage des détails des clients et l'exportation des informations sur les clients.
Gestion des clients
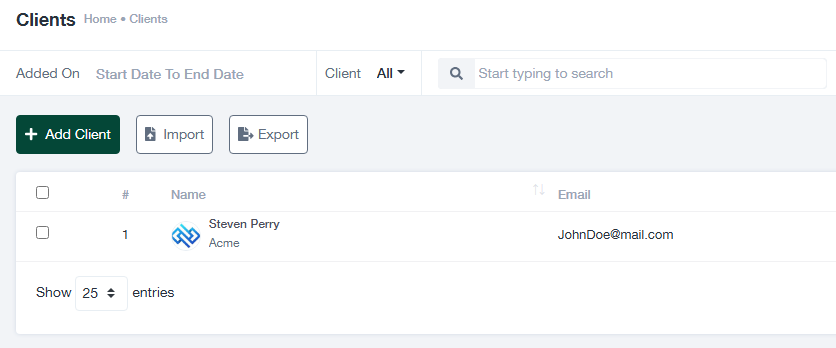
L'écran "Clients" propose des options pour gérer votre liste de clients :
- Utiliser le Importation pour télécharger en masse les données d'un client à partir d'un fichier (par exemple, CSV).
- Cliquez sur le bouton Exportation pour télécharger les données du client en vue d'une utilisation externe.
- Filtrer les clients par Date d'ajout ou effectuer une recherche à l'aide de la barre de recherche.
Ajouter un nouveau client
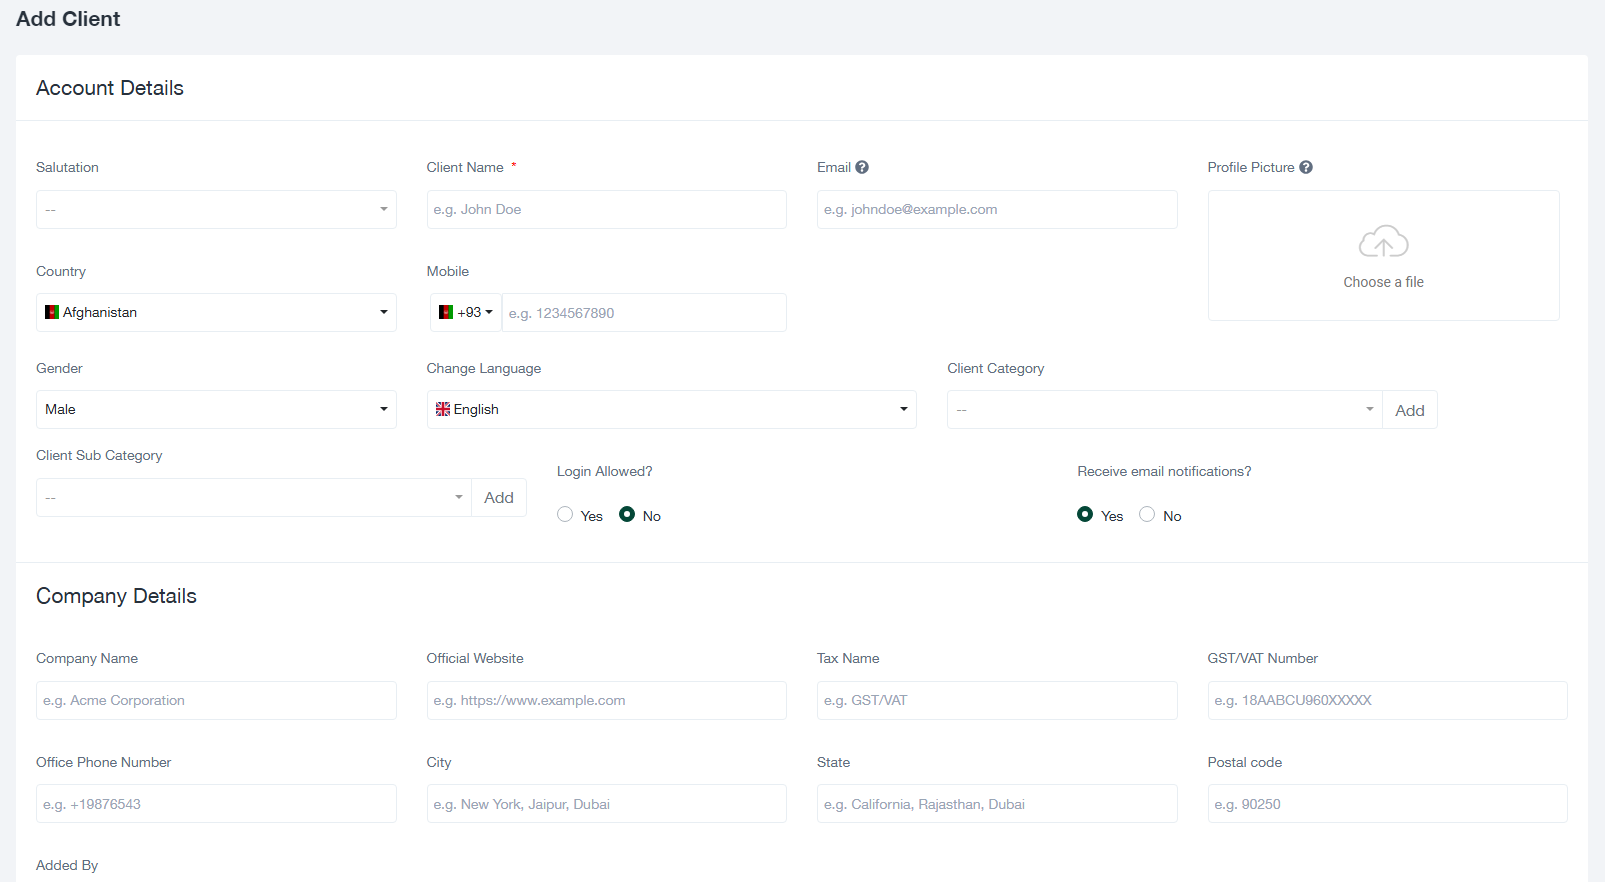
Pour ajouter un nouveau client, procédez comme suit :
- Cliquez sur le bouton + Ajouter un client situé en haut à gauche de l'écran "Clients".
- Remplir les champs obligatoires du formulaire "Ajouter un client", y compris :
- Nom du client (obligatoire)
- Courriel
- Pays et Numéro de téléphone mobile
- Champs facultatifs tels que Genre, Catégorie de clientet Profil de l'image.
- Dans la section "Détails de l'entreprise", ajoutez des informations telles que le nom de l'entreprise, le site web officiel et les coordonnées.
- Cliquez sur Économiser pour finaliser la création du client.
Visualisation des détails du client

Une fois qu'un client a été ajouté, vous pouvez consulter son profil détaillé en cliquant sur son nom dans le tableau "Clients".
- Le profil comprend des sections pour Informations sur le profil, Projets, Factureset bien d'autres choses encore.
- Les informations clés sur les clients, telles que Courriel, Nom de l'entrepriseet Langue sont affichés pour une référence rapide.
- Les visualisations, comme les diagrammes à secteurs pour les factures, fournissent des informations supplémentaires.
Conseils pour une gestion efficace des clients
- Veillez à ce que les champs obligatoires soient remplis lors de l'ajout d'un nouveau client afin d'éviter les erreurs.
- Mettre régulièrement à jour les informations relatives aux clients afin d'assurer l'exactitude des dossiers.
- Utilisez la fonction d'exportation pour les sauvegardes ou les analyses externes.