


Guide de gestion des devis
Ce guide explique comment créer et gérer des devis pour les clients, y compris l'ajout de nouveaux devis, la révision des devis existants et l'exportation des données de devis à des fins de reporting.
1. Vue d'ensemble de l'écran Estimations
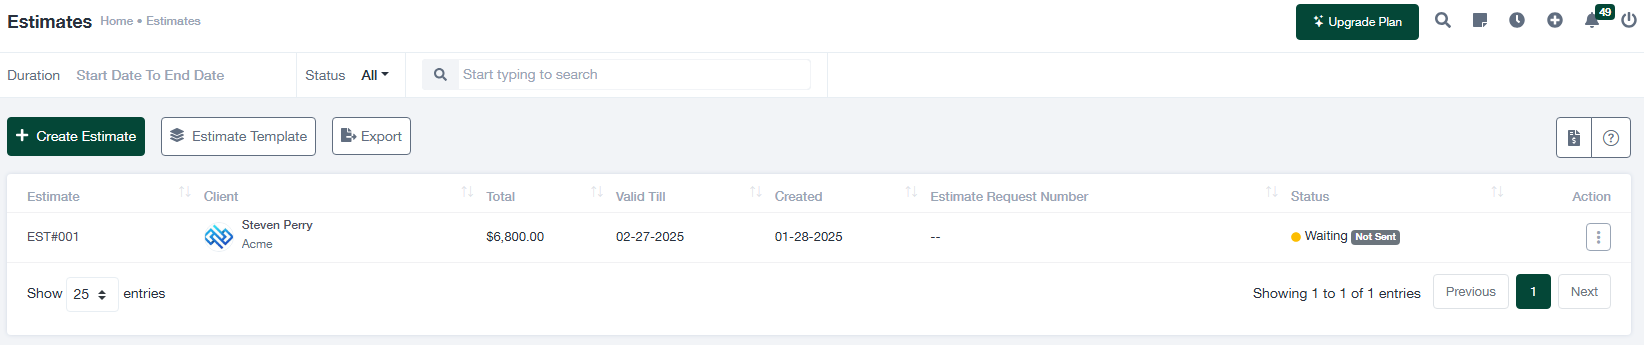
L'onglet "Devis" vous permet de gérer tous les devis de vos clients. Vous trouverez ci-dessous les principales caractéristiques de l'écran :
- + Créer un devis : Cliquez sur ce bouton pour créer un nouveau devis.
- Modèle d'estimation : Cette option permet de sélectionner ou de personnaliser un modèle prédéfini pour les estimations.
- Exporter : Téléchargez tous les enregistrements d'estimations au format CSV ou Excel pour les conserver ou les analyser.
- Filtres : Utilisez des filtres pour réduire le nombre d'estimations :
- Durée de l'enquête : Spécifiez une fourchette de dates pour les estimations.
- Statut : Filtrer les estimations en fonction de leur état actuel (par exemple, Attente, Envoyé).
- Barre de recherche : Saisissez des mots-clés pour localiser rapidement des estimations spécifiques.
- Tableau d'estimation : Affiche les informations clés suivantes :
- Estimation # : L'identifiant unique de l'estimation.
- Client : Le client pour lequel le devis est créé.
- Total : La valeur totale de l'estimation.
- Valable jusqu'au : La date d'expiration de l'estimation.
- Créé : La date de création du devis.
- Statut : L'état actuel de l'estimation (par exemple, Attente, Envoyé).
2. Création d'un nouveau devis
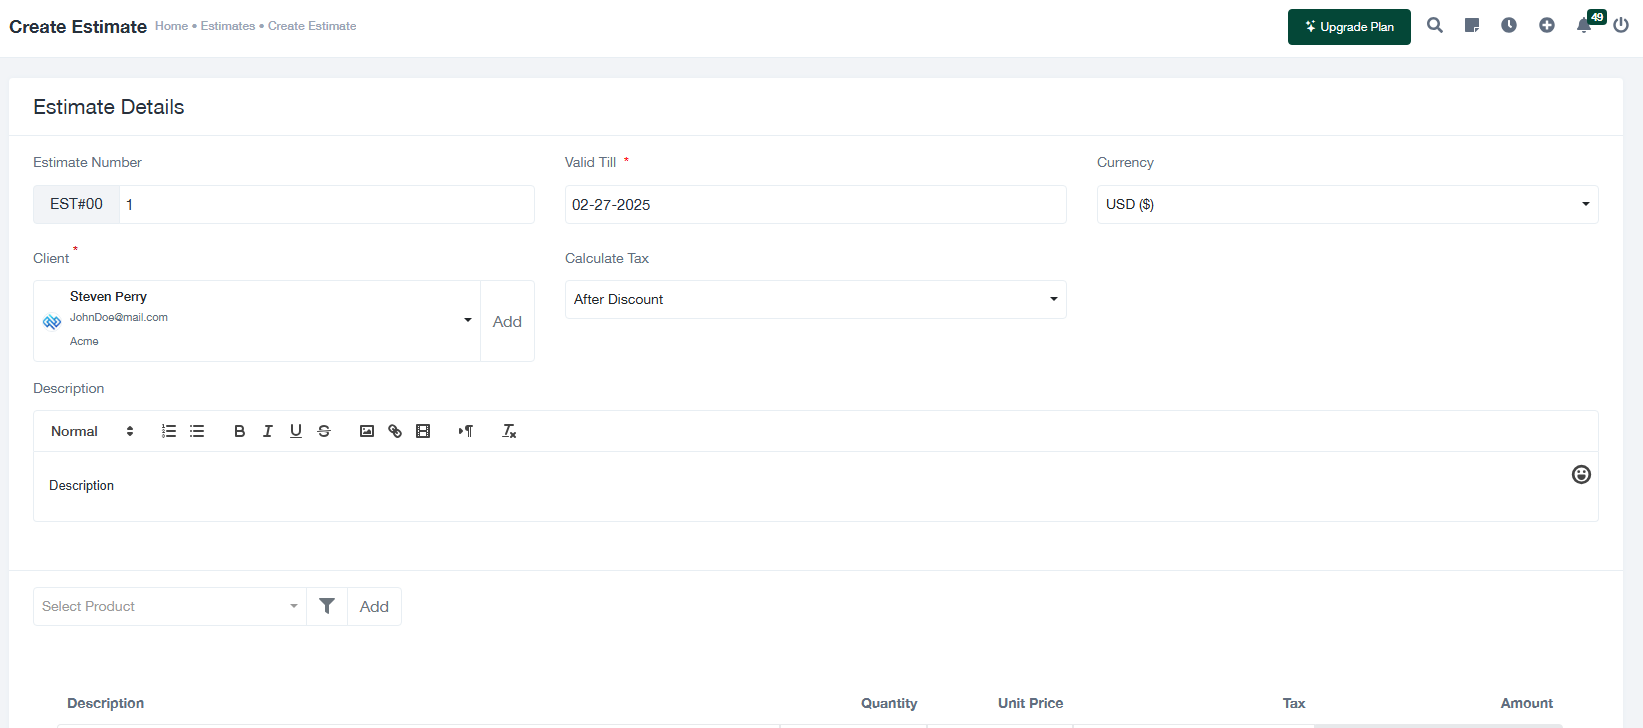
Pour créer une nouvelle estimation, procédez comme suit :
- Cliquez sur le bouton + Créer un devis dans l'écran "Estimations". Le formulaire "Détails de l'estimation" s'ouvre alors.
- Remplir les champs obligatoires du formulaire :
- Numéro d'estimation : Saisissez un identifiant unique pour l'estimation.
- Valable jusqu'au : Saisissez la date d'expiration de l'estimation.
- Monnaie : Sélectionnez la devise de l'estimation (par exemple, USD, EUR).
- Client : Sélectionnez le client pour lequel le devis est créé. Utilisez l'option "Ajouter" pour ajouter un nouveau client si nécessaire.
- Description : Fournir des détails supplémentaires sur l'estimation, tels que des informations sur le projet ou le service.
- Dans le cadre de la Section du posteAjouter les produits ou services à estimer :
- Description : Saisissez le nom du produit ou du service.
- Quantité : Préciser la quantité du produit ou du service.
- Prix unitaire : Entrez le prix par unité.
- L'impôt : Appliquer les taxes éventuelles.
- Montant : Ce champ est calculé automatiquement en fonction des données saisies.
- Cliquez sur Économiser pour finaliser le devis ou Annuler pour l'écarter.
3. Gestion des estimations existantes
L'écran "Estimations" vous permet d'examiner et de gérer tous les dossiers d'estimation. Voici comment procéder :
- Filtre et recherche : Utilisez les filtres et la barre de recherche pour affiner les estimations affichées.
- Voir les détails : Cliquez sur le bouton "Action" à côté d'une entrée de devis pour afficher ou modifier ses détails.
- Données d'exportation : Le bouton "Exporter" permet de télécharger les enregistrements d'estimations à des fins d'analyse ou de rapport.
4. Conseils pour une gestion efficace des devis
- Garantir l'exactitude : Vérifiez à nouveau tous les détails de l'estimation, y compris les informations sur le client et les totaux, avant d'enregistrer.
- Ensemble valable jusqu'à la date : Utilisez des dates d'expiration réalistes pour donner aux clients suffisamment de temps pour examiner l'estimation.
- Statut de la piste : Contrôler régulièrement l'état des devis afin d'assurer le suivi des réponses en attente.
- Utiliser des modèles : Utiliser des modèles prédéfinis pour plus de cohérence et d'efficacité lors de la création des devis.