

Timesheet Management
This guide provides step-by-step instructions on managing timesheets in the system, including logging time, reviewing tasks, and exporting timesheet data for reporting purposes.
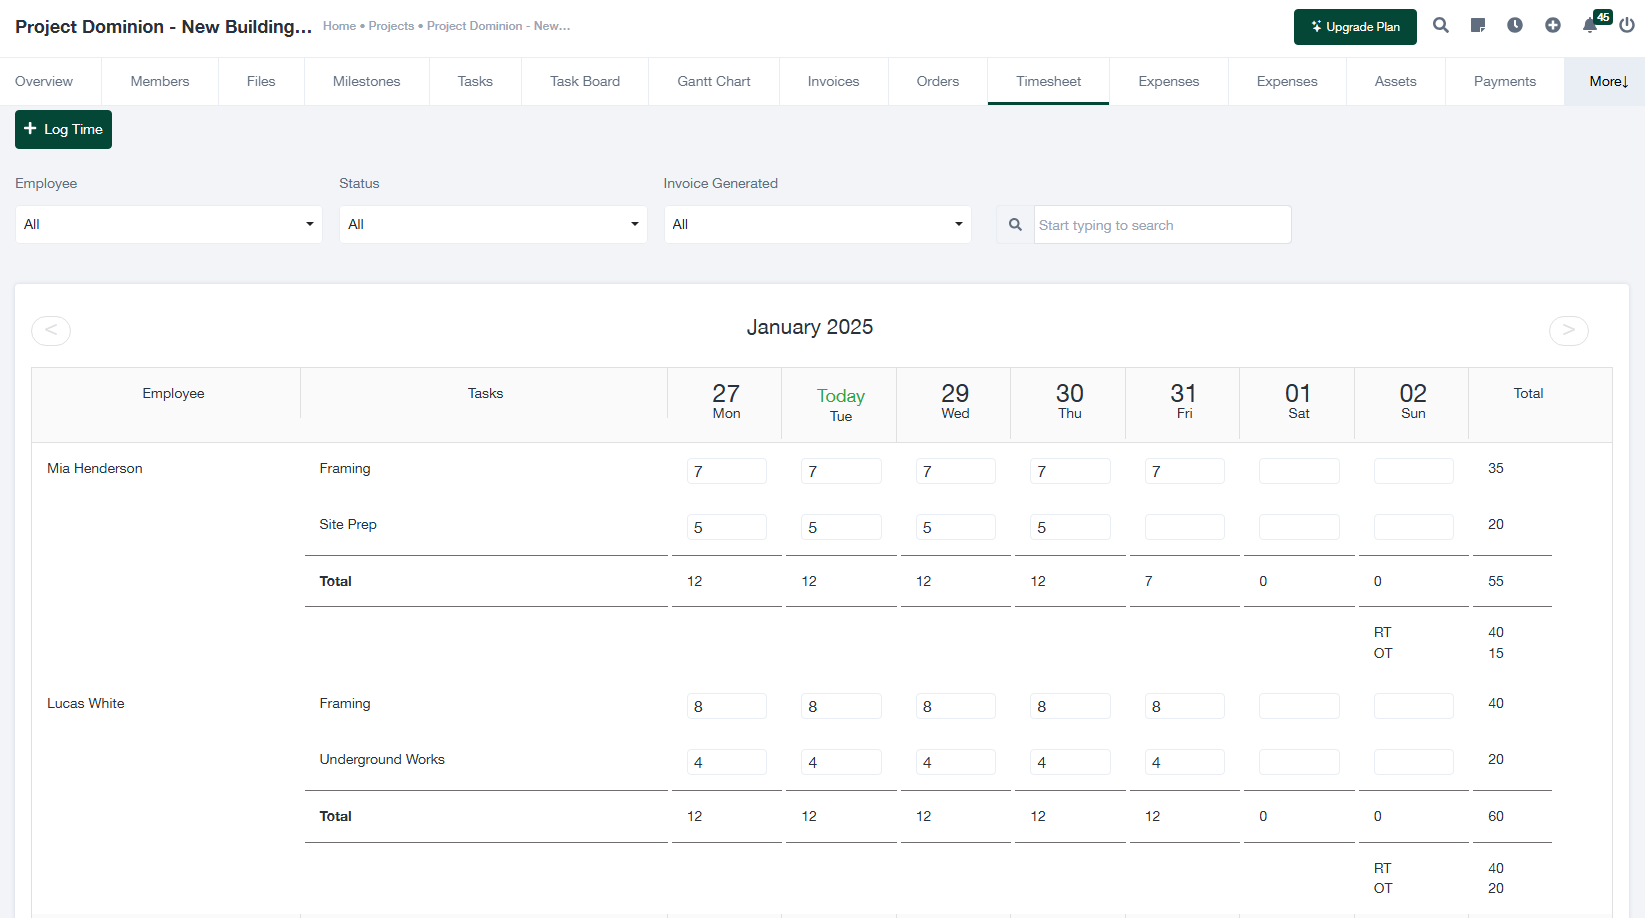
1. Overview of the Timesheet Screen
The “Timesheet” tab within a project allows users to track and manage the time logged by employees for various tasks. Below are the key features of the screen:
- + Log Time: Click this button to manually log time for specific tasks or employees.
- Filters: Use the dropdown menus to filter timesheet entries by:
- Employee: Select a specific employee to view their logged time.
- Status: Filter timesheets by invoice generation status (e.g., All, Invoiced, Not Invoiced).
- Search Bar: Enter keywords to quickly locate timesheet entries by employee name, task, or other criteria.
- Calendar View: The timesheet displays a calendar-like layout, showing logged hours for each task on specific dates. This allows you to easily track daily and weekly totals.
- Columns: The table is organized into:
- Employee: The name of the employee who logged the time.
- Tasks: The specific tasks performed by the employee.
- Dates: Columns represent individual days, with hours logged per task displayed in the corresponding cells.
- Total: The total hours logged by the employee for the week.
2. Logging Time
To manually log time for a specific task or employee, follow these steps:
- Click the + Log Time button at the top of the “Timesheet” screen.
- Fill in the required details in the “Log Time” form, including:
- Employee: Select the employee for whom the time is being logged.
- Task: Specify the task performed by the employee.
- Date: Select the date for the logged hours.
- Hours: Enter the number of hours worked for the selected task on the specified date.
- Click Save to add the logged time or Cancel to discard the entry.
3. Reviewing Timesheet Data
The main “Timesheet” screen provides tools for reviewing and managing timesheet entries. Here’s how to utilize the available features:
- Filter Entries: Use the Employee and Status filters to refine the displayed timesheet data.
- Check Daily Totals: View the total hours logged by each employee for each day directly in the calendar grid.
- Weekly Totals: Review the total hours logged by an employee for all tasks during the week in the “Total” column.
- Real-Time Tracking: Easily identify overtime (OT) and regular time (RT) hours, which are displayed separately in the table.
4. Exporting Timesheet Data
To export timesheet data for reporting or invoicing, follow these steps:
- Apply any desired filters to narrow down the data you want to export.
- Click the Export button at the top of the screen.
- Select the desired file format (e.g., CSV or Excel).
- Download the file to your system for further analysis or record-keeping.
5. Tips for Efficient Timesheet Management
- Ensure Accuracy: Regularly review timesheet entries to ensure hours are logged accurately and tasks are correctly assigned.
- Leverage Filters: Use the Employee and Status filters to quickly locate relevant entries.
- Monitor Totals: Keep an eye on weekly totals to manage workload distribution effectively.
- Export Regularly: Export timesheet data periodically to maintain backups and streamline invoicing processes.
