

Project Management Details – Part 1
This guide provides a step-by-step explanation of managing project members, files, and milestones.
1. Managing Project Members
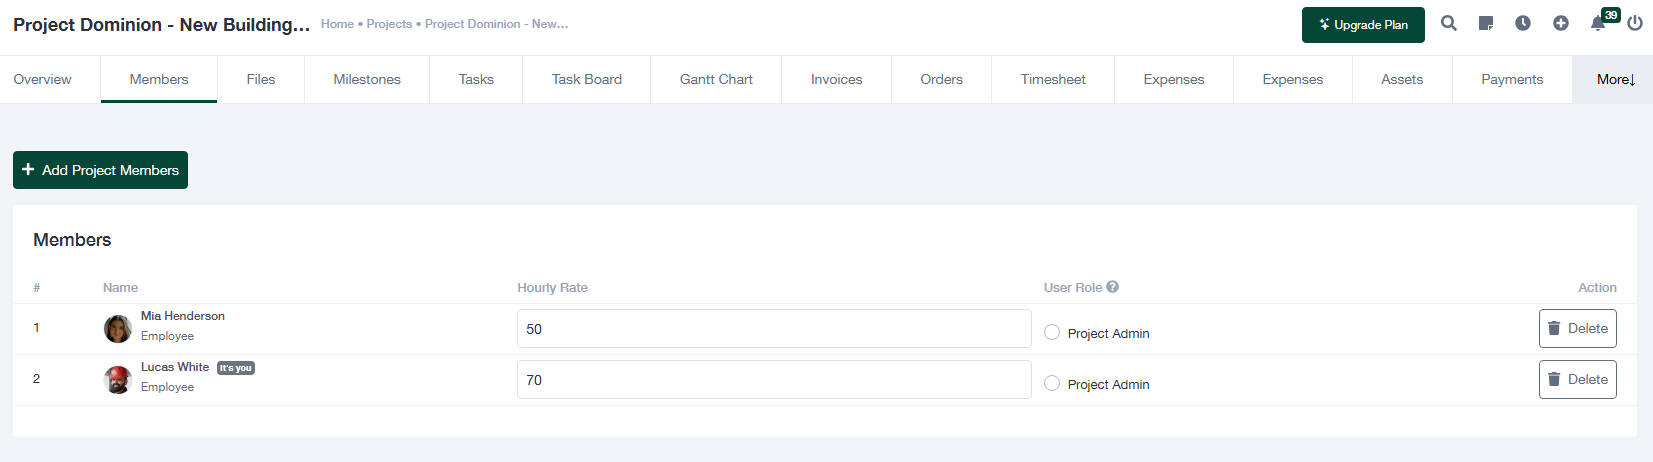
The “Members” tab allows you to add and manage team members for a project. Here’s how:
- View Members: The Members section lists all current team members, including their hourly rate and user roles (e.g., Project Admin).
- Add Members: To add new team members:
- Click the + Add Project Members button.
- Select employees from the dropdown list.
- Assign hourly rates and roles for each member.
- Click Save to finalize the addition.
- Edit or Remove Members: Use the delete icon in the “Action” column to remove a team member or update their details by editing their hourly rate or role directly.
2. Managing Project Files
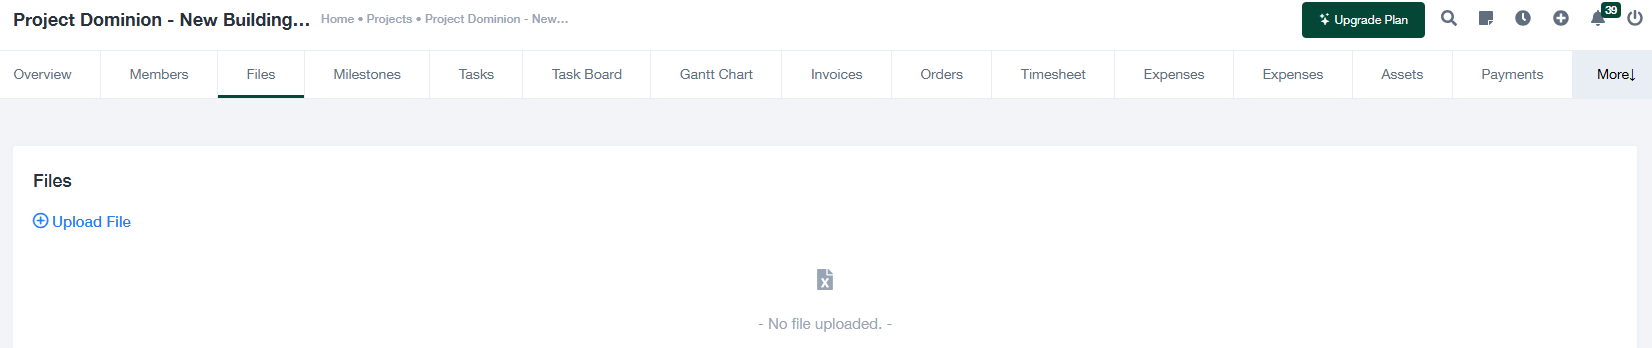
The “Files” tab enables you to upload and manage project-related documents. Follow these steps:
- Upload Files:
- Click the + Upload File button.
- Select the file you want to upload from your system.
- Confirm the upload, and the file will appear in the Files section.
- View Files: Uploaded files will be listed in the Files section for team access.
- Remove Files: Use the delete option next to a file to remove it from the project.
Note: No files are displayed if none have been uploaded yet, as shown in the placeholder message “No file uploaded.”
3. Managing Project Milestones
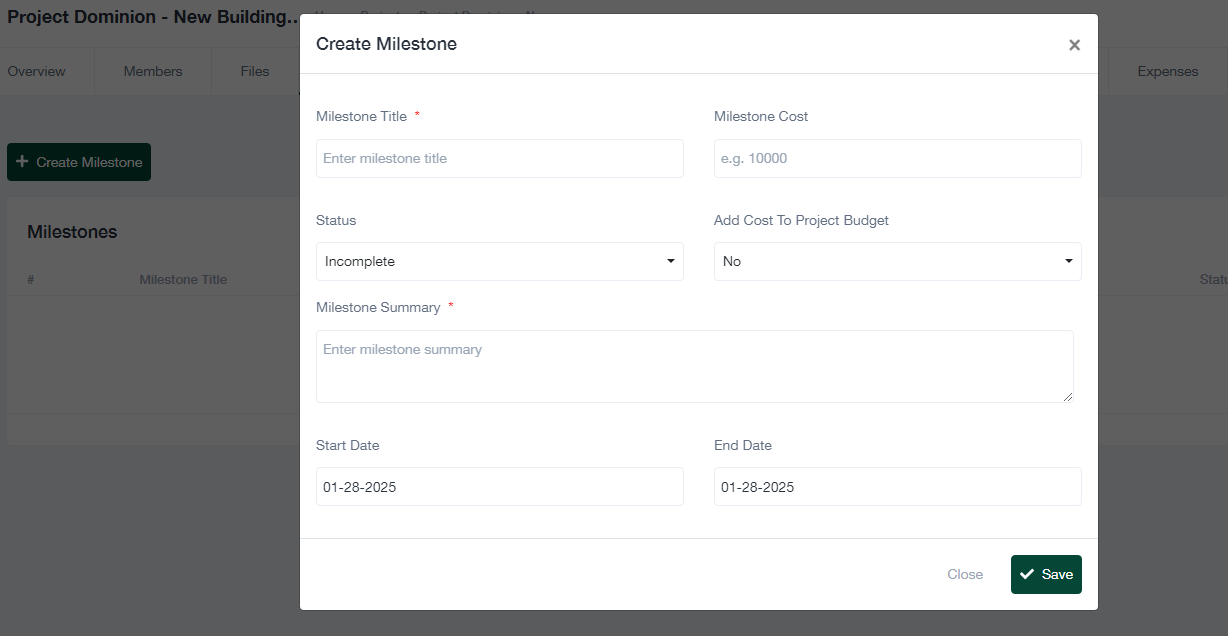
The “Milestones” tab allows you to define and track key achievements for a project. Here’s how to manage milestones:
- Create a Milestone:
- Click the + Create Milestone button.
- Fill out the milestone creation form with the following fields:
- Milestone Title: Enter a descriptive title for the milestone (required).
- Milestone Cost: Specify the cost associated with completing the milestone.
- Status: Set the milestone status (e.g., Incomplete, Complete).
- Add Cost to Project Budget: Indicate whether the milestone cost should be included in the project budget.
- Milestone Summary: Provide a detailed summary of the milestone (required).
- Start Date: Specify when the milestone starts.
- End Date: Specify the milestone’s completion date.
- Click Save to create the milestone or Close to discard changes.
- Edit or Remove Milestones: Once a milestone is created, you can update its details or remove it as needed.
4. Tips for Effective Management
- Ensure all project members have defined roles and rates for accurate cost tracking.
- Upload and organize relevant files for easy team access.
- Define clear milestones with detailed summaries and timelines to track project progress effectively.
